Podcast: Play in new window | Download
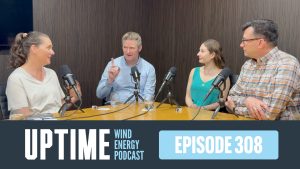
In this Uptime Spotlight, Erik Klaas and Johannes Leib from 8-Tree discuss their waveCHECK system, which detects and measures surface defects on wind turbine blades. The system uses 3D optical scanning technology to identify wrinkles and other issues with high precision, helping improve quality control in blade manufacturing and maintenance.
Fill out our Uptime listener survey and enter to win an Uptime mug!
Sign up now for Uptime Tech News, our weekly email update on all things wind technology. This episode is sponsored by Weather Guard Lightning Tech. Learn more about Weather Guard’s StrikeTape Wind Turbine LPS retrofit. Follow the show on Facebook, YouTube, Twitter, Linkedin and visit Weather Guard on the web. And subscribe to Rosemary Barnes’ YouTube channel here. Have a question we can answer on the show? Email us!
Allen Hall: Welcome to the Uptime Wind Energy Podcast Spotlight. I’m your host, Allen Hall, along with my co host, Joel Saxum. Today, we’re diving into revolutionary blade inspection technology from 8-Tree. 8-Tree’s WaveCheck system uses 3D optical scanning and augmented reality to detect and measure surface defects on wind turned blades with unprecedented precision.
Joining us is Erik Klaas, the co founder and CTO of 8-Tree, and Johannes Leib, a program manager with 8-Tree, who brings over 15 years of wind blade industry experience, specializing in composites and fiber reinforced plastics.
Joel Saxum: Welcome to Uptime Spotlight, shining light on wind energy’s brightest innovators.
This is the Progress Powering Tomorrow.
Allen Hall: Erik and Johannes, welcome to the show.
Erik Klaas: We are glad to be on your podcast.
Allen Hall: I’m excited to talk to both of you because I’ve seen your technology on YouTube quite a bit and now on LinkedIn and it’s quite impressive. And I want to start by asking really, how are you trying to handle wrinkles? It seems like wrinkles are a huge problem in the wind industry.
They’re hard to detect and we’re getting escapes out of the factory. You want to discuss how big of an issue wrinkles are. And Blades is at the moment.
Erik Klaas: Yeah, most likely this is a good topic for Johannes to speak about for one hour. But as I got into this business late, maybe I get to give you my perspective.
So when I got into the wind business first, our legacy is in aerospace. So I saw a wrinkle and I never thought it could be such a problem or lead to catastrophic results. What is a wrinkle? I happen to have a separate part here. Which is a mock up that we did. We do this for testing our system. A wrinkle basically is a deviation in the glass fiber layup of a turbine blade.
And it’s very small, so you can’t even almost not see it. But it can lead to the blade cracking in these particular areas where the wrinkle happens. And therefore, the inspector’s task is to measure how wide and how high is a wrinkle. And so the ratio between width and height is what they then calculate, and there’s a limit to that ratio.
And that is what an inspector has to do. And currently, they are doing it with hand tools. And a hand tool is a Dial gauge or it can be what they call a comp gauge. So they push it on the surface so they get the contour of this wrinkle and then with that contour they measure actually the width and the height of it.
Allen Hall: It can be very difficult to detect some of these wrinkles because the laminates in these longer blades, the laminate is very thick. So if you have a wrinkle somewhere in the middle of this laminate, the surface Defect or the surface curvature change is minuscule, right?
Erik Klaas: It is. And there is a limitation of our technology that I need to speak about.
So we can only detect and measure those which are on the top layer. So if they go through the whole layup of layers and they are visible on the surface, we can measure them. And if they only appear in deeper layers, we can’t. So you need like NDT measures, methods that go to deeper layers to inspect those.
But most often also the layer the wrinkles in deeper layers are visible than on the top surface.
Joel Saxum: So you need that physical deviation on the top. If you ran your hand over it, you’d be able to feel it. And that’s what you guys need to be able to have to sense it. Okay.
Erik Klaas: Yes. What we are doing
Joel Saxum: so our
Erik Klaas: measurement technology is a surface inspection technology.
So it always measures deviations on the surface. Correct.
Allen Hall: So as part of blade inspections, ideally those wrinkles are getting measured for length and width and all of them in which there can be a number of them on any blade because wrinkles are not uncommon. It’s the question of, are they serious enough to be repaired?
I think the question then becomes how sensitive is your equipment to do this? Because we seem to have a lot of blades out in service that do have wrinkles. I’ve seen them. Yeah. Over the summertime, I saw a number of them. It’s hard sometimes to detect the wrinkles. It is not necessarily obvious to an inspector that the wrinkle that exit may exist there or how critical that is, but the sensitivity of your equipment is quite impressive.
You want to describe how sensitive it is to small perturbations on the surface?
Erik Klaas: Yeah. So what we use, the technology is, it’s called structured light scanning and how it works. It projects a pattern on the surface and from a different angles. Those patterns are observed from a camera, a digital camera, and as there’s an angle in between, so when the surface changes, also the shape of these patterns changes, and that’s how is, how we get access to the third dimension in these measurements.
And so what’s good for us, that technology has developed over the last 20 years quite significantly and it’s not a to go into the micron level of detail. surface deviations. And I mentioned, so our background is aviation industry. So we, with the same technology, we measured dents and bumps on the outer skin of aircrafts.
And so there are our measurement uncertainties in the magnitude of 50 microns, or those People that prefer inches, so that is two thousandths of an inch yeah, 50 microns. Accuracy in the wind power industry, or on surfaces like glass laminates, is a bit worse. Because the surfaces are difficult to measure.
They are a bit transparent, they are a bit rough. Yeah, it’s, in the best case, 50 micron.
Joel Saxum: Yeah, I think anybody that’s been inside of a blade can attest to at least one defect in every blade, right? If you’re in there looking around, you see something, whether it’s a, extra glue here, or some dry glass here, or a little bit of D lam here, and it, one of the difficult things from, from an untrained eye, I’ve been in a lot of them supporting people. is knowing what’s actually an issue, right? Because you’d look and be like, oh, is that a problem? Is that going to affect structural integrity? Maybe not. Maybe this one will.
And that takes expertise. But what you guys have created is a tool to help these experts. And so what I want to talk about is then, The ability to scan, cause a lot of times we’re talking inside of the blade, right? Cause we’re looking, cause the outsides gel coat, it’s all cleaned up.
Everything looks pretty. So everything’s been sanded and smooth. But if you’re inside the blade to get that 50 micron accuracy, Okay. So in my mind, I’m always thinking geometry, there has to be a certain distance to be able to look at that angle. How big is this tool? So how far can these experts get in the blade with it to be able to look at things?
Erik Klaas: Yeah, good question. And so of course also the tool has evolved over time. So in the background we see actually two versions. There’s one over there. I hope that’s visible in the image. So that tool has a standoff of about 50 centimeters. The weight is about four kilograms, four and a half kilograms. It’s all self contained.
So it’s battery powered, so there’s not an additional computer. It’s all within that unit. And. Yeah, you can go pretty far into a blade to use it until your space is limited to this about maybe 70 centimeters. So that’s the space you need in front of the surface.
Joel Saxum: And anything I mean, 70 centimeters is, so if you’re getting down to basically, with someone operating at like a meter of a chamber or so, most all of the defects that need to be dealt with are going to be from there back towards the root anyways.
Because that’s going to be the high structural loading zone. That’s where, if you’re going to develop a crack or something, those are the ones that you really need to see. Can you tell us about some use cases in the field or where this thing’s being used right now?
Erik Klaas: So yeah, we mentioned wrinkle measurements and wrinkles in and maybe that’s a better question for Johannes to answer because how blades are made, I think is that there’s different opportunities and as these butterfly blades, where they make them out of two shells.
And glue them together afterwards. There it’s not a problem to access the entire inside of the blade. So to the very tip of the blade. But what are the other technologies, Johannes, that used to make
Johannes Georg Leib: Currently, our tool is mainly used in the manufacturing because that’s where we started developing it with some of the big global blade manufacturers.
But we are also looking into applications in the field because the, yeah. The functionality of the tool is just the same in the field as it would be in the factory. In the factory, we are now also going towards automatization. That it’s not a handheld tool anymore, but we’re doing some research on having it automated on either a robot or yeah.
a portal stuff. Basically the technology works everywhere because it’s independent from any infrastructure, you can take it anywhere. It’s a, it’s very portable. It’s battery powered. You don’t need a a power
Allen Hall: supply. So the wave check system has changed or morphed over time to become more compact, more powerful.
The first generation I remember seeing. The sensor was maybe, I’m going to speak in feet here, but it may be two feet, two thirds of a meter away from the surface. I saw it in aerospace quite a bit. And it was, it’s fairly far away, but now it’s getting more compact and is still all battery powered.
So really it, it doesn’t take anything to hold it up against the surface and take an image. Exactly. So that’s the
Erik Klaas: first unit’s design and then we took all the user feedback that we got from the first five, six years of A Tree being in existence. And we came up with this design,
which looks quite a bit different, but, The measurement engine and the technology is still the same. So we’re using a projector on this side where the light comes out. We’re using a camera on this side. We are having a battery now in the bottom, which makes a bit more ergonomic handling possible. It’s more like a power tool, where you have your battery in the handle or below the handle.
So that makes a nicer central center of gravity. And the handling is just easier. And yeah, it lost like one kilogram in weight. I see a lot of carbon fiber there. Yeah. And there’s carbon fiber in the handles and in the housing and on top is a display, so that makes it a bit easier to adjust for different settings.
So you can change tolerances for your wrinkles or you can change also what we take into account is the fiber direction. So usually we are measuring perpendicular to the fiber direction, but there’s requirements sometimes also for the other direction. So things like this can be set with the help of this touch display.
Joel Saxum: So how do you actually collect data with it? Is it taking a snapshot? Is it taking a video? Is it giving you a 3d map? What does that look like? It’s all of the above, but
Erik Klaas: the main feature is a 3d map. Not sure whether that’s visible in the video, but I push the trigger here on the handle now and you see a blue flickering light being projected on the surface.
And that’s taken in a tenth of a second and about two, three, four seconds later, we get the result. And the result is a 3D map, about 2. 4 million points, 3D data points on the surface. And what’s unique about the system, it projects those results on the surface. So you don’t have a computer attached where you see the result on the display of the computer, but everything is visible on the screen.
On the surface where the defect actually happens.
Joel Saxum: Yeah. You got a two man team there. Like one guy can run the gun. One’s got a pen. You can mark it out perfectly, exactly in real time, what you’re seeing for that anomaly on the blade, if it’s a wrinkle
Erik Klaas: and on top of that, the
Joel Saxum: results are
Erik Klaas: stored on the device.
So there’s a relatively large hard disk. So you can save 10 thousands of those measurements on the hard drive, just like a photo.
Allen Hall: I just want to get to the use piece. Cause I think people want to understand how this actually works. Erik, I take your device, I push it against the blade, I press a trigger, it takes a photo, it processes it, and then it re displays the changes in the surface.
on the blade itself. So you see color changes right on the surface, which you then can just take a pen and highlight. And it stores that data on the unit, but also stores it in the cloud, right? So not only do you have a record right in front of you, this is what that defect looks like in a wrinkle, but everybody back in the office, all the engineers and the quality department have an instant record of what this thing looks like.
Is from your unit. So there’s, it’s very quick and precise, which is the problem with blade checks today is that they’re slow, cumbersome and inexact, and you fix all of that with one tool.
Erik Klaas: Yeah. That’s a very nice summary. Thanks for that, Helen. And on top of that, so we also now in the process of making interfaces to quality systems, because we know we are not the end of the game.
The results that we are delivering need to go somewhere. And now we try to make that even more seamless by defining APIs that then connect to a quality management system or an ERP system so that these results are filed away. Ideally, they travel then with a blade to the customer. So the customer has a digital twin of that blade and he can look up, okay, there was a wrinkle in production, but it was below the limits.
And
Allen Hall: some of the best blade manufacturers in the world are using your technology now in the factory. You want to describe that? Who’s using it? We developed this
Johannes Georg Leib: with input, even before I, as the blade expert in EITRI joined. We developed this together with LM Windpower and they were actually also the first first users of this.
But nowadays some other of the global blade makers such as TPI have also implemented it in the, during the last year, yeah. And yeah, we see that they have a lot of yeah, making a lot of progress in this let’s say digital evaluation of defects, which yeah, which is really driving quality assurance of blades, a big leap forward from our point of view.
I’ve been working in blade manufacturing as well as in certification, and I remember the times when there were big fat file folders with paper yeah, tons of paper per blade. And if you wanted to look up something then it was not properly filled in and so on. It was not traceable at all.
If you wanted to look up something in the aftermath, you just had no chance because yeah. And nowadays, you would have like a. Exact representations, 3D representation of certain defects, which you could easily retrieve 10 years later and and check, what was going on there.
For example, if a blade breaks you could really have accurate records and check if there was something or not. And that’s something that is not yet appreciated enough. from our point of view, from the industry, because they want to avoid any cost. Yeah. As we all know in blade manufacturing, cost is still a big topic while quality is, yeah, more on a second or third position.
And we think it’s time for changing this by by applying, let’s say 21st century technology to blade inspection, because let’s say the tools that were used when I entered this This industry in 2008? Yeah. These were actually the tools that were already used or that you could have already have been used a hundred years ago, I would say.
Yeah. So we had no involvement in, in, in such inspection tools over a hundred years. And we think now, with all these AI stuff, the time should have come for doing something. In a new and in a different way. And that’s what we are striving for and working on.
Joel Saxum: I think that the basis of that is what you guys are delivering.
It’s data, it’s structured data. If blade manufacturers want to get better at what they’re doing. The one thing is in, in, at the end of the day, Inspections in the factory are basically reactive in my opinion, right? They’re done. We look at it right now. Okay, now we might have to do a repair because I know a lot of these blade manufacturers have on site repair teams to prepare stuff before the blades leave because it’s a controlled environment and all that.
But there is times when a lot of these blades make it out to the field and then all of a sudden, oh no, we have to do this big repair out in the field. But the idea behind collecting structured data that can be cataloged, reviewed, and once you get. enough of this stuff amalgamated, you can start running some algorithms on it.
You can start running a little AI. You can start doing some analysis to see where the manufacturing process might get better in the future. That’s a big thing for me is if you’re collecting all this data, that’s fantastic. We can fix problems right now. But if you get some smart people behind taking that data and using it for the next next edition, next iteration, next legacy of blades and how we may adjust manufacturing things.
If we keep seeing the same wrinkle of the same size in the same kind of space because you guys have collected or your tools have collected the data to show that, now we can get to the point where let’s put a manufacturing fix in. Let’s get to the manufacturing engineers and see if they can’t design something to solve this issue in the future and that makes That’s better for the whole wind industry, that’s what we want.
We want blades that come out of the factory that are good to go, that we don’t have to worry about in the future. Thank you guys for creating this tool for that. Yeah, that brings me to
Johannes Georg Leib: one point I want to mention because right now our tool is mostly used when the blade has already been produced and there is a need for repair often then if you detect something, but what we are also investigating together with some partners is to apply it even before the The problem happens.
Yeah. So for example, during the layup, we do scans of the layup. And then, the workers are told online during the manufacturing process, Hey, this layer is maybe 10 centimeters too far away from the correct position. Please move it even before the blade is being infused. And that’s let’s say the next generation we are working on where the tool is not anymore used handheld by an inspector who just evaluates things that have already happened, but use it, let’s say proactively Beforehand, the stuff even happens and in an automated environment, where you have a lot of different sensors, like cameras but also our 3d scanner that then creates information that avoids the mistakes already during, in the course of the manufacturing process.
And that’s another initiative that we’re doing yeah, and that might also be interested in, maybe it will take another 3 to 5 years until it’s ready for market. But it’s, I think it’s good to know that there are some people also working on such things.
Allen Hall: Erik, it can’t take three to five years.
We need this in about six months. So you got to get to work.
Erik Klaas: Yeah. The good news is, yeah, I see a lot of parallels between the wind power industry and the aerospace industry, for example. So in the early days, when we founded A3, like in 2012, We went to a rigorous process of running so called gauge R& R testing.
So because our customers wanted to know, how do you make sure one tenth of a millimeter is one tenth of a millimeter or one thou is one thou? And so we learned it the hard way that we needed to test and test. And we ran like thousands of such gauge R& R tests. And now, when we started with LM Windpower, we did that again.
So people wanted to trust us that when we say, okay, this wrinkle is within or without limits, that we are really on the right side of that decision. And how can you make sure? And then we found out that there is actually an ISO 17025, which guarantees your measurements are traceable to national standards and you can trust us.
And so in the course of this development, and that took a long time, and now I’m back to that question, why does, do things take so long? We had to run with Johannes help, we got our calibration accredited by German lab so that they say, okay, you can trust these guys. And now we have that stamp of approval, which is called ISO 17025.
And that helps a lot now because in industrial processes, they want to know, okay, how do they make sure they measure what they measure is correct.
Allen Hall: Absolutely. ISO 17025 is the world standard for calibration. And if you can show that your tool. matches those requirements, it’s a really good tool and it’s used all over aerospace when that happens.
So the accuracy has to be there when you’re dealing with aircraft in particular because of the, there’s a lot of people inside of there. So those systems that are developed from aerospace now directly. Correlate over to the wind industry. So it’s tremendous to have that level of calibration. Now, I want to expand this out a little bit because there’s a lot of old blades in service, hundreds of thousands of blades in service that didn’t use your technology in the factory.
And. I want to understand, is there a use case for this for independent service providers to go in and to look for places where wrinkles could occur? Back to Joel’s earlier statement, around the root area where the loading is so great and where cracks start to develop. Can you take this existing tool off the shelf and start looking at existing blades and documenting where wrinkles may exist?
Erik Klaas: Yeah, we absolutely think you can and we start to talk to the first companies that do that sort of inspection. And of course, that’s a different story because getting up tower, getting into the plate is a different story. It’s more work and it’s also more time consuming and it requires smaller tools.
And that’s why we did the second generation. So that also helps to to enable this inspection up tower. And but we are in the early stages.
Joel Saxum: Yeah. The looks of it, it looks like the second generation can fit through a root closure panel and to get into a blade a lot easier than the first version.
Yeah. So for that
Erik Klaas: exact reason, we can fold this frame together. We can remove that handle so that you can put this in a backpack when you go up tower. So it’s just more compact for that purpose.
Allen Hall: It looks like the system is ready to go for inspections out in the field, which is tremendous. So if you’re an independent service provider or a quality organization or an NDT organization, And you want to learn more about WaveCheck and all the great things that are happening at 8-Tree.
How do they get a hold of you, Erik? How do they contact your company?
Erik Klaas: Very simple. Send an email to info at 8-Tree. We have for wind power applications, a dedicated LinkedIn page. Go up there or go to our webpage, 8-Tree. com. Eight with a hyphen tree. com. And yeah, we are happy to explore what’s next.
Allen Hall: And the website is the number eight dash tree, T R E E. com. Erik and Johannes. It’s wonderful to have you in the program. I’ve learned a tremendous amount. Your technology is very exciting. So congratulations on all the breakthroughs that you have. And yeah, we love to have you on the program again as you get further out into the field.
We’d like to learn how that’s going. So you’re invited back. Thank you for joining us today. Thank you for having us.
Erik Klaas: Really enjoyed
Allen Hall: it. Yeah, it was fun. Thanks.


